

You Will Need:
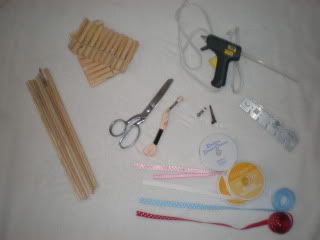 Wooden Dowels: They should each be around 1/4" thick and around 10" long. You can purchase your dowels at Walmart or use pencils instead. But if you choose to use pencils, your curls will not be as tight.
Ribbon: The best is grosgrain, and it should be around 3/8" wide. Korkers use more ribbon then most bows. Michaels always has lots of ribbon for a dollar; just make sure each spool has at least 9 feet. Michaels also always has a 40% off one item coupon in their ad each week, so be sure to use it! Also, I love checking my local Craigslist for people selling unwanted ribbon. Check the garage sale section, and search ribbon. I have been very lucky in doing that!
Wooden Clothespins: I got 36 of them at the dollar store, which is plenty!
Cookie Sheet and Oven
Scissors and Ruler
Clear Nail Polish
Needle and Thread: I use embroidery floss for a tighter hold.
Alligator Clip/Barrett/French Clip: For the best deal, get your clips on Ebay. Sallys Beauty Supply also has them, as well as CVS.
Hot Glue
To Make:
Preheat your oven to 275 degrees.
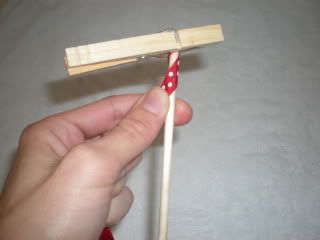
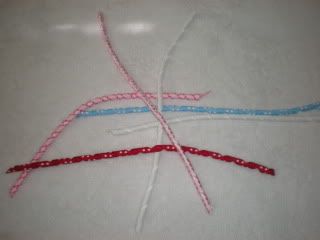
First, you have to make your korker ribbon. To do this, clip the end of the ribbon to your dowel with a clothespin and wrap the ribbon around it by twirling the bottom of the dowel. Once you've reached the end of the dowel, clip a clothespin on and cut the end of the ribbon.
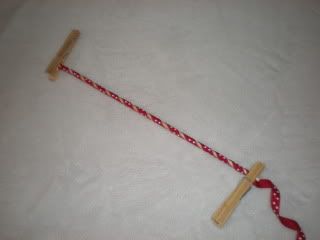
To make one decent sized korker bow you need to fill at least 3 dowels. 4 would be even better, it just depends on how big you want it. For my 3-month-old, I usually use 3-4 dowels per bow, but she is still tiny. For an older child you may want to use 5 or 6. So fill up as many dowels as you want, depending how many korkers you want to make.
When you are finished rolling your dowels, cover a cookie sheet with tin foil, (to prevent the ribbon from getting dirty) set your dowels on the cookie sheet and bake in the oven at 275 degrees for 25 minutes.

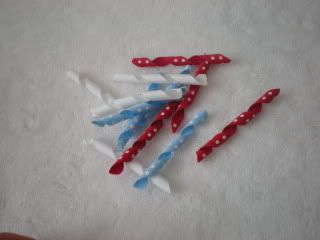
When your ribbon is done cooking, take them out and let them cool for about 5 minutes. Unwrap them, and you should have wonderful looking korker ribbon!
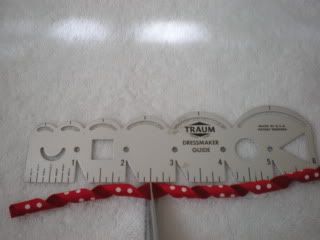
Using the ruler, you're going to want to cut your ribbon into 2 1/2"-3 1/2" pieces. Make sure whatever size you choose they are all the same. Once all the pieces are cut, brush some clear nail polish on all the edges to prevent fraying.
Now comes the fun part. Take your needle and thread and tie a knot in the end of the thread, leaving about 2 inches to spare.

Take all the korker pieces you want for one bow and thread the pieces on the needle in the patten your want. Make sure you are sticking the needle in the middle of the ribbon.
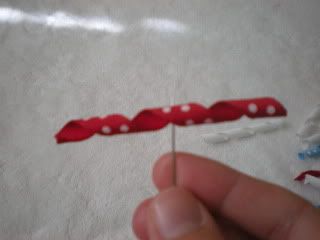
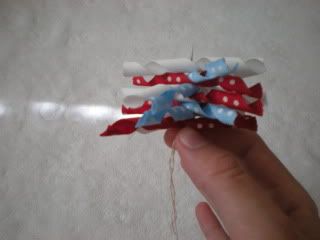
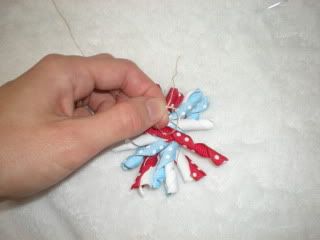
Pull all the korker pieces down to the knot all at once. Then string the ribbon back through the middle making sure not to go through the same hole. It's actually easier to hold the ribbons, pinching the middle while doing this last step. I just couldn't do it that way while taking the picture.

Tie the two ends of the string together in a double knot.
 Fluff the ribbon, glue the bow to your Barrett/clip on the back and attach it to a crochet headband or in the child's hair!
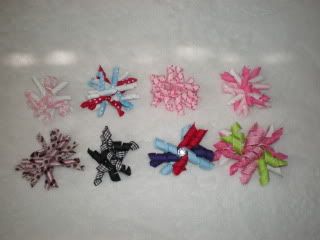 The bottom two on the right were made with pencils.
good work!
ReplyDeletecongrats for your baby
meets from mexico
bye
Im no expert, but I believe you just made an excellent point. You certainly fully understand what youre speaking about, and I can truly get behind that.
ReplyDeletetie store